

What is an HP Designjet Z9 Plus ?

The HP Designjet Z9 Plus DR is a wide format ink jet printer using 9 color stable fade resistant pigmented inks with an optional Gloss Enhancer transparent overcoat. All new HP Designjet Z9 Plus DR also has dual roll feed and a vertical trimmer. Dual Roll and Vertical Trimmer option is available on the Z6dr. Approximate price at the time of writing; Z9+ 24” 2995$, Z9+ 44” 4495$, Z9+ DR Vertical Trimmer 6895$.
Please note the DR and Vertical trimmer is exclusive to the 44” model on option.
HP Designjet Z9 Plus Ink 746 cartridges are around 140€ print heads universal around 100€.
Media formats start as small as sheet media US letter or A4, up to A0, and roll formats starting at 279mm / 8.3 in to 1118mm / 44in. The HP Designjet Z9 Plus DR has dual roll feed with two independent feed paths, with top loading sheet feed as the second roll feed is in place of the rear feed sheet path.
The HP Designjet Z9 Plus DR is the only printer of its kind to have an optional dual blade vertical trimmer to cut media in X Y directions.
It is destined to professional printers, design studios, and or fine art photographers requiring art gallery quality large format prints or high quality display prints on demand.
Options available are a Gloss Optimizer kit which is a print head purge, one 746 universal print head, GE cartridge and USB key. If you print gallery prints on pearl/luster or on glossy media you cannot pass this by.
A high production site will greatly benefit for a robust industrial motorized paper take up roller. Anyone doing overnight unattended print runs, especially with the DR dual roll option will really appreciate the thought that went into this device. These take up assemblies are usually reserved for far more expensive 60” or wider printer thus nice to see an option for these 44” printers.
The other accessories for HP Designjet Z9 Plus DR would be extra roll spindles, 3” core adapters, and end caps.
A full set of maintenance options are available. My experience with localization HP service has been stellar. If you are running this printer in a productions site then it is reasonable to have your printer covered.
Some other exotic accessories for specialized CAD work, Scanners, but that is out of my domain.
In this HP Designjet Z9 Plus DR review we’ll cover most of the features, the advantages, and problems encountered in use.
A great PDF that answers all questions about. HP Designjet Z9 Plus DR
Disclaimer: This review of the HP Designjet Z9 Plus DR will be revised over time as I could only test media on hand due to confinement during Covid 19 pandemic. When I have more OEM media I will update this review.
How does it compare to previous printers?
Having a lot of experience with HP Designjet Z printers the last one being the 24” Z3200, I dare say this is one impressive printer!
Why?
The list is long. Printers in this class have already achieved their goal of print quality. Everything else is just optimization on what was already done.
Speed is the first intent of this HP Designjet Z9 Plus DR.
HP doesn’t really emphasize this enough. It is easy to get lost in the numbers and comparisons with other competitors, yet all that matters is can it print my pictures in excellent quality fast. The answer is yes, effectively the HP Designjet Z9 Plus DR prints quietly and quickly. I am not talking about spool speeds that are slower than previously yet once sent to the printer as single file or queued prints it is amazing.
A small note, this printer is the energy efficient printer I have had as well as being the quietest. Here are the Energy Star certified specs for the HP Designjet Z9 Plus DR < 100 W (printing); < 32 W (ready); < 0.3 W (< 6.5 W with embedded Digital Front End) (sleep); 0.1 W (off)
Thing is, the competitors all are fast, yet it is hard to know at what print quality the numbers really mean. HP decided to let that go, concentrate on getting it right at Normal quality. With HP this spells great print quality, hard to discern any difference with Best. Other makers at normal print quality are in my opinion not on par. So, print speeds listed for all brands can be misleading. I’d say the Z9 is twice as fast as the Z3200 which was fast enough.
I also wanted to applaud HP for posting data on their printers that others do not; like ink stability, Delta E numbers, line accuracy, all with transparency above board. One could only hope the other brands would do the same.
Note, the 24” HP Designjet Z9 Plus is actually faster thanks to its shorter carriage runs, with 228ft2/h compared to 185ft2/h for the 44”. HP states” Fast: 769 ft²/hr (71.4 m²/hr) on plain media; Normal: 185 ft²/hr (17.2 m²/hr) on coated media; Best: 48 ft²/hr (4.5 m²/hr) on glossy media[1] “
These numbers are good, yet I suggest looking at real print times. That said the recently released Epson P9570 specs are way faster, and Canon printers seem to be faster as well.
HP Designjet Z9 Plus printers are much quieter in operation than the competition!
A totally new writing system called Pixel Control which employs Dual Drop print heads allow for fine graduations and enhanced detail with less inks. The resolution is 2400×1200 droplets per inch, yet that is not the whole story. With the new heads produces a fine droplet of 3pl, allowing a visual appearance of a light saturated color.
When controlled effectively through Pixel Control this eliminates need for light dilution inks. The problems associated with using light dilutions are removed to make the printer more efficient in print speeds as well as print quality.

Design
I never found design of any previous generation printers very exciting. The Z3200 was sloped curvy, and rather nice. Yet placing prints on top was a risk as they could roll off. This new printer is sexy! I love the way it looks, you have the impression it wants to fire up and spit prints out showing off its speed.
The roll covers are nice, no longer do you worry about dust or even unloading for roll pinch marks. Roll covers are transparent thus viewing the roll is easy. Now, the drawback is the covers have switches which are over-sensitive. As much as touch the covers and you could have your paper unloaded. Too bad there is not a delay in the switch or firmware.
Personally, I cannot understand why printers do not come with a dust cover. I cover mine as the plastic used attracts dust, not sure if the movement by the carriage creates static electricity or not but it really likes dust! For the price of this size of printer no matter the brand delivery without a cover is absurd.
The transparent yet dark lid is not scratch resistant; be careful with anything that could scratch it. One area a missed opportunity is the cover should have been clear plastic or better a Color Correct LED inside the cover for print viewing while it is advancing. Epson did it why not HP?
Yet one perfect update is the touchscreen LCD, easy to use, and allows access to feature rich printing.
What is much better is the metal graduated sheet path if you do not have the DR option. Rear load, easy access, as good as it gets for sheet loading. Unfortunately, if you have a DR the second roll uses this path for roll nº 2.
Top load sheet path. Gone is the lift lever for the wheels and pinch system. Now it is automated. They have not made a guide for the sheet path that makes sense. It wasn’t good on the Z3200, it is not great on the Z9. Not sure why they could not come up with a solution for this.
Auto load seems to work well now, yet I was able to make the Z3200 work for me after a few firmware updates allowing manual skew checking. That is no longer needed.
If the paper doesn’t load it goes forward and is released automatically asking you to place it at the lines in the front. No longer do you need to lift the release leaver.
Silence in operation; much better here. The sleep mode is great fully EnergyStar compliant. Wake up fairly quick, and maintenance tasks well done. Gone are those horrendous fans in the Z2100-3200 series, and I couldn’t be happier with the HP Designjet Z9 Plus DR in sleep mode.
Options for remote printing: incredible vast list of choices, the Z3200 was efficient as its competitors, the Z9 is in a world apart. No one knows more about getting network printers to do more, nor can they match the security of network connections.
The HP Designjet Z9 Plus DR incudes a large capacity print server/operating system disc 500GB, as well as a well-tuned Adobe Postscript 4, while the competition it is an expensive option.
While they could have changed the take up fabric/basket they didn’t. Neither the past printers nor this one are up to the competition.
So, in a nutshell: the new Z6, Z9 series is a great update, for speed, silence, looks, efficiency in almost every aspect, and too many print path options to list. To top it all off is the world’s first LFP with a dual blade vertical trimmer!
Is the HP Designjet Z9 Plus DR for you?
By the end of this HP Designjet Z9 Plus DR review you’ll know more. Being such a comprehensive printer there will be many details not covered here. There are only a few reviews on this printer. Here is an honest review you may like. HP Designjet Z6 Review by Fantasio
Before the official launch of this printer I had a before shipping model of this printer which gave me a taste of its potential. It was not without problems, call me unlucky as most others were not experiencing any major problems as I was.

Delivery and set up of the HP Designjet Z9 Plus DR
The unit comes on a compact palette for the size of the printer, and is very heavy. Yet the palette weighs a lot and the heavyweight corrugated cardboard adds up. In fact, the HP Designjet Z9 Plus DR is lighter for the print width than the competition.
I was able to move the HP Designjet Z9 Plus DR in a standard elevator when turned upright. Not ideal for such an expensive printer but renting a crane was not an option!
Two people can manage this printer, 3 people is better and with easy 4. The instructions are great, no details are left out. As always HP goes to great lengths as far as including Torx screw drivers for the few screws required for assembling the stand to the printer base.
It is quite an ingenious way of installing the printer, then uplifting the stand and printer.
Save the box and the palette. The box can be folded as the strength comes from how it is attached to the palette.
Mark Lindquist made an unboxing and set up Youtube video, I suggest watching it before the printer is delivered to have an idea of how much space is required and time.
It is large but not overly: 71 x 27.4 x 39.3 in (1802 x 695 x 998 mm)
HP Designjet Z9 Plus DR has a strong stand that doesn’t move while printing.
A printed instruction sheet in the box shows you everything, or you can find that online here: HP Designjet Z9 Plusdocuments.
I strongly suggest you take a few pictures of the box the way the roll holder and base parts are lodged in the top box tray. Take pictures of the places they have installed the stops for the head which is tapped and has a special block. All other blocks with tape will help if you have to send it somewhere change installation sites, or other.
There are some details that can save you time frustration and money.
It is marked in the set up instructions there could be a USB key with the latest firmware, which must be installed at initialization. Please look for it, yet I suggest you download the latest firmware from HP and make your own key. You could do this before receiving the printer, as the FRMW is quite large.
If you have any intention of adding the Gloss Optimizer option: buy it along with the printer.
Initialize the printer only when you have this, and the most recent Firmware update on a formatted USB memory stick. This is because the Gloss Optimizer kit may not install correctly without first updating the firmware BEFORE YOU INITILIZE the print heads! If this happens you’ll be out a print head. You will have to update the firmware anyways so do it as a first step!
You can download the latest firmware here: Software and drivers
How does it Print
I have limited media to test it with. Of the papers I have, essentially, I wanted to test out third party papers.
My favorite paper is Hahnemuhle Photo Rag Baryta. It is one of the best choices for fine art printing. I’d love to try the Canson equivalent, if someone wants to send me some.
Here is where I am disappointed. The whole idea of the Z+ series is the embedded i1 spectrophotometer linked to an auto calibration and ICC profile creation. This worked so perfectly well previously with the Z3200. Epson eventually offered an expensive upgrade yet the implementation was not at all as good. Over time it has been updated and now the optional i1 is a valuable and noteworthy goes far beyond what HP are doing.
Calibrating paper is easy as expected, test chart colors extremely vivid. Easy to see the color mixing doesn’t need light dilutions to print a fabulous extended gamut range.
HP Designjet Z9 Plus DR’s built in i1 will read the calibration chart, create a correction LUT for that specific media. This calibration is used for both printer manages color and application manages color.
Next profile calibrated media being fast and efficient as always.
Yet the results are off, way off! Redoing the calibration or redoing the ICC profile didn’t change results of the ICC profile are just not right. Printing with Hahnemuhle’s OEM ICC profile for this printer was very good without correction.
One solution is to profile your monitor and media with the X-Rite i1 Studio, here is the link to my review if you want to know more.
I took the time to print charts out for making profiles in X-Rite i1 Profiler. Big problem, the printer has no option for no color correction print correction. It alters prints with no profile attached. Impossible to send an untagged chart through Adobe Print Utility, thus impossible to have a no correction path.
Impossible to have a Postscript Acrobat PDF assigned no color correction. The only solution is to tag the charts with Prophoto working space synthetic profile. This is not the way it should be. I asked HP in the beginning about this yet they have not done anything. Considering the level of this printer it is an absolute requirement.
That said perhaps it is my system, Apple Mohave at play. If it is that too is a QA problem with drivers.
For now, I have to hand profile prints from a hacked workflow (assigned Prophoto RGB) and hope for the best.
Prints on Hahnemuhle PRB with the downloadable OEM Hahnemuhle profile are very good. Handmade i1 Profiler created ICC profiles are only slightly than Hahnemuhle’s custom profiles. I would like to know if Hanemuhle hand measured charts or just posted the Z9 internal created profile made on their machine?
Colors are very good, with smooth graduations, excellent sharpness, and rich detail. The new print head technology is great, the smaller drops mixed with bigger allows for better acutance; my prints are sharper, more detailed than previous Z3200 prints which I already considered great. I used to add more sharpening in Lightroom Print module that I do with the HP Designjet Z9 Plus DR
Again, there seem to be problems in printing ICC color profiles to greyscale. With the Z3200 any tones near grey were replaced with just grey inks. For prepress people that equates to GCR / UCR making ink reduction possible. For inkjet printers removing color ink lets a very neutral shadow to exist. Wonderful, you never worried about have coloration in the blacks from Z3200 prints.
Not so with the Z9, where quite disappointing results are found in shadows and or grey areas, if printing monochromes with the color profile.
When you print monochrome with HP Designjet Z9 Plus DR there is a new setting to use only grey inks.
This works really well and the results are good. I do see some dot patterns and peppering in some transitions. This may be bettered if paper advance is recalibrated, and changing paper settings to a better adapted height. However, doing this will cost you re-calibrating and profiling! It likely is the larger 7pl droplets for PK and G and 6pl for MK. I have seen this in various transitions.
Print head height is best left down with star wheels for these types of paper. I have had some head strikes on edges with the wheels up. The occasional drop as well, but that happened on the Z3200 too. Sometimes in strong light you can find the wheel marks, but you have to look.
In this aspect I wish HP would make the carriage bed aspirated to avoid star wheel lines and or head strikes. For most users and usages this will not be a problem. For fine art printers unfortunately, it can make for rejected prints.
Gloss Optimizer in the HP Designjet Z9 Plus DR works well as expected yet the option of Eco doesn’t work in the same way. I find the Z9 has less differential, likely because the culprit was always the light dilution inks which are no longer. I find it is still useful as some papers are notorious for gloss differential, and HP’s solution is fantastic. It is the only real solution as without it you have to limit your choice of media.
Matte paper. I have always adored the look of a fine art print on mat. I have tried several, Epson Enhanced matte, Hahnemuhle Photorag 308, some other >300 gram/m2 papers roll and sheet.
Other than the same difficulties in ICC profile creation with the embedded i1, and the inability to send an untagged raw file for profiling, the hand made i1 Profiler ICC profiles worked out very well when sent through as Prophoto.
Just as on Photorag Baryta the print qualities are superb, gradients smooth, and details as exact as in the onscreen image.
Unless you have reason to print with wheels up say for extra thick paper, I suggest leaving the wheels down. I have yet to have visible star wheel lines on matte. It really depends on paper thickness.
Vertical trimmer
If there is one reason to go with this printer it is this!
Being first to offer this in the market is only a part of the story.
It is not a simple roller to cut off the outside edge. There are actually two roller cutters which align to the margins set. Not only is this incredibly useful for fine art prints, but poster printing with borderless results cut to specific size is truly a feat!
Most have struggled with placing fragile papers on a flat surface usually the floor. Cutting off in multiple passes the borders with a box cutter and straight edge! That is gone with the vertical trimmer option. On the inside edge the cut is clean. On the outside unfortunately, it is a bit crunched thus you will not be able to use and paper surplus cuts without first retrimming.
HP state saving 20% of production time with the vertical trimmer. I dare say it lets the painful task of trimming fine art prints without error, which is far better than a percentage. It makes the almost impossible possible, and for that it is a major step, and a major advantage!
Media
The HP Designjet Z9 Plus DR handles the usual photographic media anything up to 0.8mm thick or average weight of 500g/m2. A tad light on thickness, something the competitors have always almost doubled. What is new is a special Canvas made from recycled support that cuts perfectly well with all cutters. The only papers their technical specs list as not suitable are the Adhesive Media and extra heavy canvas media. That I find perfectly normal. You need simply open the top cover and cut with a razor, or advance the feet and cut.
You can choose to print on the media edge for automated control of roll usage and length.
Borderless printing on the HP Designjet Z9 Plus DR is possible on photo media, with different margin oversize options. All settings for borderless are updated in the print driver window and detailed explanations are directly in the same window.
Paper handling Dual Rolls Sheets

There are two roll covers on the HP Designjet Z9 Plus DR, the bottom roll occupies the space of the rear sheet feed.
I do like the new roll covers, as before covering older printers was something of a necessity. The new roll cover (s) are excellent in that respect. No longer is there any dust to enter making the rolls always ready for printing. On top of that I have not seen the previous pinch roller marks that had to be cut off if the paper was not unloaded for longer periods.
The HP Designjet Z9 Plus DR now has motorized spindles making the feed accurate. It is not however infallible as sometimes the curl in the paper can tell the printer to unload the media after the print is finished. The covers are switch controlled. Those switches are overly sensitive so as much as bump the cover and it will unload the media!
There is a lot of logic into how the dual rolls work. The basic idea is you can load different types of media, different sizes of media ,or the same size and type for unattended printing.
As stated earlier sheet feed with the HP Designjet Z9 Plus DR has to be top loaded. This is just okay, not great, yet once you get used to it, on anything but A4 or Letter seems to work. Finding the perfect placement for the paper edge is a problem you cannot put the edge too close nor too far. The rear feed on the non DR HP Designjet Z9 Plus is far easier and you still have top load if you need it (lack of behind the printer space).
Inkset, print heads, and printer economy

The print heads are now unique universal PH 746. You wouldn’t think this would be important. Yet now you can a spare new print head on hand, and no matter the problem you are ready. Previously you’d have to have one of each bi-print head stored resulting in a higher cost.
While it may seem an unimportant detail, the print heads are vastly different. Not only the print heads themselves, but the entire writing system had to be redesigned.
There are two rows of nozzles the smallest being 3 picolitre droplet size.

The second row of nozzles allows for a mapping of fine droplets making the use of light dilution CMY redundant. With excellent screening and line advance, graduations from full saturation to very bright colors are covered with ease. There are many problems with light dilutions, above cost, mechanical demands such as gloss differential to make it easy to understand why it is better to have one dilution of the primaries, and add chromatic colors to extend gamut.
Through testing it is known that in some ways overlaid colors can build color while other areas actually desaturate and loose density! Bravo HP for this vast improvement, not only in print quality, corresponding gamut, but ink and print head economy.
By having less inks actually makes for a stronger maximum density, HP reports 4 L* min/2.5 D. This is obviously on a high grade photographic paper, not on other papers!
Here are the drop sizes: 7/3 pl dual-drop weight (M, C, PK, CB, G); 6 pl single-drop weight (Y, CR,MK, CG) To be clear the 7 picolitre / 3 pl is for the first ink colors, Yellow, Chromatic Red, Matte Black, Chromatic Green are single drop 6 pl.
This Pixel control makes for a very economical frugal printing possible. Although all brands argue their points, direct comparisons are hard to do. What is exceptional HP was the first in LFP to have printer accounting in their embedded web. There are too many features to discus here, yet I want to say the package is ultra complete, nothing was left out.
For anyone who is using the HP Designjet Z9 Plus DR in a production environment you will be astounded in the viability options such as accounting. To top that off, HP can access the printer remotely for trouble shooting which makes for minimum downtime, and more efficient service.
Single cartridge sizes are 300ml. It is shipped with small starter cartridges though so be aware you’ll soon need a full set.
Print heads are under warranty for one year or 1.2 litres of ink equal to 4 cartridge changes whichever comes first.
I’d guess they will print for some time after out of warranty. If you have problems you should change the print head. Nice that you can have a spare or two on hand as they are all the same not like previous color specific print heads.
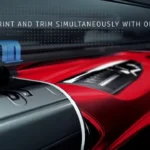
Horizontal and Vertical Cutters
For the first time in the large format printing industry, HP has introduced an embedded vertical trimmer in the HP DesignJet Z6dr and Z9⁺dr printers. This brand-new asset has changed the way to print and has elevated the printing experience to another level of simplicity: with one single device, you will be able to print and trim simultaneously to borders sized and ready to ship.
With innovation comes some complexity. This is well handled though, and detailed instructions are available. Basically, if you have 20mm on the sides vertical trimming can be made. Printer marks reflect changes so you should know where the cut will be, standard margins or borderless methods. HP Canvas is accepted, and generic may get by too. Minimum weights being 80g/m2 maximum 500 g/m2 which is very good.
The vertical trimmer has calibration methods Automatic and manual if the cut lines are different than expectations. I find it easy to perform either calibrations.
I was already cutting canvas with the built-in automatic cutter. A bit risky as I went through cutter blades faster than I should have. I can imagine it stress the cutter, and transport.
Good news the HP Designjet Z9 Plus DR has a robust cutter made for cutting their OEM canvas media. You can find more information on expected usage of cutters in the PDF . HP Designjet Z9 Plus DR
Colour Touchscreen Front Panel

The HP Designjet Z9 Plus DR has a new retractable color front panel with touchscreen.
Navigation is simplified, logical, and fun with menu items a swipe or two away.
Not only does it allow all functions but is the control center for printing from USB keys locally. I really like the ability to recall past prints that have a color preview of the image. It is faster than a list of prints that are the document name.
Being able to retract the panel leaves the top surface flat, yet is practical when angled forward rather than leaning over the printer.
Everything in the menus is clearly explained. So well that anyone experienced in printing will have little need for the printer manual. That said if you do there is a QR pictogram that allows you to access the manual online with your telephone. Quite ingenious actually.
Most controls are available in the embedded web server. Yet the base settings by default are very handy on this panel. If print settings are set in application level the defaults are overridden.
What can you throw at it? Print formats accepted.
Pretty much anything, always a strong point of HP. A new embedded Adobe Postscript 4 print engine that handles all of these: Adobe PostScript 3, Adobe PDF 1.7, TIFF, JPEG, CALS G4, HP-GL/2, HP-RTL
The reason being for the good and bad of it; HP produces versions of these printers for various sectors with *different model names. Thus, the accepted formats include far more than photographic images, going as far as CAD and drawing maps.
That makes this HP Designjet Z9 Plus DR very polyvalent, especially for print shops where one printer can do an amazing different style of printing and all well.
A 5ooGB hard drive can hold a lot of previous print files, and it is equipped with 128GB of shared memory. I do not believe that this is an upgradable memory, yet if HP deemed it would be better to have more memory they would have made that an option.
Remote printing from external sources.
What surprised me when receiving this printer, was the polyvalence of the HP Designjet Z9 Plus DR but the panoply of print methods. Combined with accepted formats the tools available for printing to the printer outside of a connected LAN are there: Direct print from mobile apps on iOS, Android and Chrome OS; email printing with HP ePrint and HP Smart app for iOS and Android.
Of course, the new option is the USB port with easy access right above the LCD panel. For clients bringing in prints this is a fantastic option fully color managed and set on the pages.
All of which can be set to nested printing done automatically to save paper, and time.
A universal HP print app called HP Click has rendered printing from other applications without having the print driver on their computer called HP Click. I’ve not had much time to try it, yet in business locations it seems to offer a simplified print path to the HP Designjet Z9 Plus DR or Z6.
Another option especially for poster printing on demand is HP Applications Center
Connectivity and Printer Security
Largely underestimated, the importance of networking security is fundamental. Some users will appreciate the enormous efforts HP made with the HP Designjet Z9 Plus and Z6 printers, all will benefit from the tight security with these printers. Nobody is better placed than HP as a leader in security.
When you take into consideration all of the options for printing to this polyvalent machine, it is a very good thing. You needn’t worry that your printer will be compromised causing downtime delays, nor the loss of you print jobs.
HP offer some high end security application for industrial strength controls. That level of integration is way beyond my level.
The HP Designjet Z9 Plus DR has only one port: Gigabit Ethernet. Certainly, this offers the best in security, fast transfer times. That is IPv6 protocol the best we have today.
Although, I cannot understand why wifi was not included, not even as an option. An oversight? I cannot say but this a huge drawback. You’ll need a router to print to your HP Designjet Z9 Plus DR to which you can join the network.
Conclusion
This is a true polyvalent production printer covering multiple vertical market areas. Not only can the HP Designjet Z9 Plus DR cover aspects in a target area as photography the HP Designjet Z9 Plus DR will go as far as a large lab installation, further on to a print on demand poster shop, to a design studio and much more.
It is fast or fast enough, has options for productivity or specialized installations.
HP Designjet Z9 Plus DR is unique with its Vertical Trimmer which saves on space, time, and errors in trimming off edges. Dual rolls add new possibilities for your environment that adapts itself to your requirements.
The HP Designjet Z9 Plus DR is efficient in ink economy with the new Pixel Control engine, making for high quality at faster speeds than previously possible. The embedded Adobe Postscript engine makes the HP Designjet Z9 Plus DR an excellent choice for graphic artists, design studios, and prepress shops with its Pantone matching functions built in and large range of accepted Postscript files including PDF.
With the HP Designjet Z9 Plus series a built in X-Rite i1 assures fast consistent calibrations, and more importantly creation of custom per media ICC profiles. Integration with third party RIPS with a robust SDK kit available offers potential for calibration and proofing.
HP Designjet Z9 Plus DR with optional Gloss Enhancer provides a serious solution for eliminating gloss differential due to differences in ink on reflective surfaces. The new HP Designjet Z9 Plus DR reduces gloss differential no longer employing light dilutions, yet for fine art prints the Gloss Enhancer kit is a great option that works on any brilliant surfaces unlike other brands that only works on specific media, or not at all.
+
–
Vertical Trimmer
Dual Roll Option
Adobe Postscript 4 Engine embedded
User replaceable print heads
Vast choices in print applications
Quality, Gamut, and permanence of fine art ink set
Production options including industrial take up reel
Excellent Color Front Panel
Fast printing
No WiFi option
i1 embedded spectre does not work thus internal profiles are useless
Maximum thickness 0.8mm
Poor sheet paper handling very difficult to load
Terrible design of roll inserts
Lacking in driver color controls
Lacking in profiling options
Non-aspirated paper feed
Smoked plastic top cover without a viewing light
After a year sitting idle
After a year of non use and not being on idle, the printer started to plug the print heads. I had to buy at least 1 new one. And there the printer accepted but a few days after had to be reseated as it was creating errors. HP France were very nice about helping, yet it did cost me 70ml of ink! Incredible, considering all the other print heads have 100ml through them while only printing test prints for this review. Normally print heads should be good for 500ml minimum.
After, many restarts and cleaning of the sponges, it started to work better. Yet the frustrations of the deplorable sheet paper loading, and the inability to make a profile with the embedded i1 Profiler.
The process to profile the printer is not easy, as there is no colour processing without colour mapping internally.
The best I can do is tag the i1 Profiler chart with Prophoto and print with the same profile. This is not really allowed within Photoshop and they suggest when using a “null profile” to use Adobe Printer Utility.
As I said that is not possible as the HP z9 has imposed color transforms thus it is impossible.
The profiles created with Prophoto to Prophoto within Photoshop are good but not as good as they could be.
The printer has an amazing potential for gamut yet is not usable.
I have had a few other Z9 owners ask about the i1 and they too have problems in getting anything usable out of it.
Please note, Calibrations use a three colour reading which should bypass the i1. The Printer Manages Color, profiles that are registered are in fact made from the calibrations and not the i1.
They print with good enough results.
Hand made profiles though are highly recommended.
Or download third party media profiles, which are also very good ( for example Hahnemuhle papers).