
X-Rite i1 Display Studio Review Complete Display Profiling Kit
Is the X-Rite i1 Display Studio the right profiling kit for you?
In this X-Rite i1 Display Studio review, you’ll find out if the X-Rite i1 Studio Display is the color management package for you?
Let’s face it everything we do is display or screen centric. Manufacturers have gone to great lengths in making display technologies as good as they can be out of the box.
Yet if you love image making, is that good enough a generic intention that has to fit into a pleasing color world?
That is where X-Rite has been providing solutions for decades to us image makers. What greater joy can there be in knowing your ever increasing archive of images is built on a solid foundation of confidence in true colors and densities in what we see?
For a small investment, the X-Rite i1 Display Studio brings you that ultimate feeling, which is essential to anyone serious in image making. Average retail price in Europe including VAT 150-170€ or 150$ USD excluding tax.
You can’t chase a moving color target by eye.
Measuring and correcting to make an ICC profile with an X-Rite i1 Display Studio allows high precision color to be achieved optimising displays for color sure workflows, be it video, stills photography, and graphic arts. Truly it is so simple, and you need only the desire to take control of you color management as i1 Display Studio needs no former training. It starts with your monitors, and only after will you be able to print match for your own or outsourced lab prints.
Past, present, and future editing is all based on your display colors control.
Confidence goes a long way in your display color, and that assurance shows when you are presenting your work. Profiling a projector is just as simple, with just a few clicks and minutes later your presentations have an optimised color gamut making your presentations so much better!
X-Rite updated its innovative hardware an all in one color management kit called ColorMunki in 2018 with the release of the X-Rite i1 Studio and accompanied by a forward thinking proprietary award winning software to drive it. The device at launch is an updated ColorMunki a solid base to build on, taking the new X-Rite i1 Studio with a complete easy to use User Interface and new modules.
The X-Rite i1 Studio kit is an investment that provides a serious high level solution for managing all color, capture to delivery with Display and Projector profiling at the center and precise print profiles only possible with a reflective spectrophotometer.
Building on the success of the X-Rite i1 Studio package released Feb 2018, they introduced the X-Rite i1 Display Studio on Sept 2019 to have a more affordable solution for those wanting the best in display calibration and profiling without superfluous bells and whistles that more expensive packages have.
X-Rite is the number 1 company bringing end user solutions for graphic artist, photographers and videographers. They have always been there trying to make color management easy or easier! The X-Rite i1 Display Studio monitor and Projector package is just that. A kit built upon the industry defacto standard i1 Display colorimeter, delivered with the wizard based semi-automatic software bearing the same name.
What it does, who is it targeted for, and what it doesn’t do
The X-Rite i1 Display Studio is a monitor / projector bundle, running on the exact same software as the i1 Studio kit. That is a very good thing, as the software is incredibly easy to use, no previous experience needed in color management. The defaults when profiling is automated whenever possible, much of which runs in background tasking leaving the user make only a few basic choices. The software which is downloadable here, is based on the professional i1 Profiler color engine, thus the same accuracy is consistent throughout X-Rite’s color management solutions.
Most top end portable computers, and displays have a very good factory default condition that can bring consistent reliable display qualities.
Yet those qualities are decided for consumers desires on what we’d say pleasing color, rather than accurate color. Even with Apple’s excellent displays iMac, iPhone, iPad, MacBook Retina, they employ a tweaked Display P3 color space.
To calibrate to a known space will not wildly change the appearance, yet will optimise the colors providing total confidence in what you see is what you get. While your edits in video or stills images can take your creativity to new places, the base is a perfectly calibrated and profiled monitor.
This X-Rite i1 Display Studio is for image makers desiring reliable accurate color from their display devices, and presentations at a professional level with ease of use and set up to a minimum.
Click on this link X-Rite i1 Display Studio to take you to X-Rite’s site for more information.
And, all this at a reduced price point! There are no corners cut, nothing left out, everything most users will ever need for display and projector profiling is there.
Not only computers and displays, but more!
You can calibrate and profile telephones and tablets with an iOS or Android application called ColorTRUE. See below for supported devices.
Apple iOS:
- iPad 2, 3rd gen, 4th gen, Air, Mini, & Mini 2nd gen running iOS 7.x or later
- iPhone 4, 4S, 5, 5c, & 5s running iOS 7.x or later
- iPod Touch running iOS 7.x or later
Google Android:
- Samsung Galaxy running Android 4.0.4 or later
- Google Nexus running Android 4.0.4 or later
- Asus Transformer running Android 4.0.4 or later
- HTC One running Android 4.0.4 or later
If you want to do more the X-Rite i1 Studio kit is an ultra complete package that includes the spectrophotometer and a Color Checker Classic for source profiling scanners, and cameras (also very useful for print evaluation), and print profiling. The application is the same friendly wizard semi-automated you have with the Studio Display thus no learning curve for either!
If you want to know more to help you make the decision click on this link to my review on the grand X-Rite i1 Studio review
Features

The X-Rite i1 Display Studio is a professional grade colorimeter delivered with i1Studio software.It replaces the former ColorMunki Display with new hardware and ludique software with professional results with ease. No software has been better design to fit this purpose. No matter your domain, photography, video, or graphic arts.
Primary function is fundamental: Display calibration and profiling. And that it does extremely well! No matter the type of monitor it will align color, optimising all levels of displays from laptops to high end editing monitors.
Projectors as well are covered in the same easy methodology as monitors. With a simple turn of the lens you’ll be profiling monitors and all your screens. You can have 4 monitors on the same computer to profile in the application!For portable device calibration simply download the appropriate ColorTrue application iOS or Android (see list above for compatible devices). Once calibrated you can view your images in a very accurate view port. ColorTRUE launches on your device and asks you to connect (if it isn’t by already) to your computer with your X-Rite i1Display Studio. Follow the onscreen steps, similar to a normal display calibration.
Upon completion your ColorTrue profile is uploaded to the cloud and can be used on this or any ColorTrue Aware apps. Amazing seeing your images now exactly as your calibrated monitor! A great feature, for perfectionists, worth a try.
Display and Projector Profiling
Display Profiling

In this X-Rite i1 Display Studio review we’ll look at options in i1 Studio application. A little tip: your older devices both ColorMunki Display, and ColorMunki integrate with X-Rite i1 Studio. You can simply download the X-Rite i1 Studio software and your ColorMunki will use the new software.
The advantage of the X-Rite i1 Display Studio is its small form factor and lightweight.
X-Rite i1 Display Studio covers all monitor types, yet expect the best results with a recent high quality monitor or display (if built-in).
Display and Projector profiling incredibly easy, almost automatic.
Your choices and our recommendations; (you can have up to 4 monitors on the host computer if you have multiple monitors they will be display as named icons).
Click on the display you want to profile and the application window will move there. X-Rite i1 Studio assumes a default panel type, but you can change this in the drop down if it is incorrect. It is however sticky, in that it remembers what was last used. That is if you change the type of backlight, it will be remembered.
You have 3 choices for workflow, Photo, Video, or custom. For most photographers if you select photo; the default CT is D65 at 120cd/m2 and 2.2 gamma is my preferred settings. You can select custom where your choices are various white points, gamma, and luminosity.
The reason for D65 is this is the defacto standard for web viewing, display, sRGB, Adobe RGB and more. Other less used preferences in color temperatures for stills images may be D50 or 5500K which could be ideal if your lightbox has 5000K lights. The possibilities are there for those who seek to adapt their set up for their environment. Yet most will find D65 the best choice.
For video set ups, the default is DCI P3 in the drop down, yet you’ll likely want to change that to REC709. Please note that each preset has a different luminosity. If it is too dark, choose another or a custom photo setting. Here too Rec 709 is the most common destination video space, which is quite similar to sRGB. Choose your video target according to your reference editing requiremnents from the most used video spaces in the drop down. The X-Rite i1 Studio is made for you with more than enough options.
Flare Correct, you can measure the color of reflections off your screen, making the contrast and CT match the ambient light reflections.
I am not sure who would find this useful, so just leave it off. Yet try it out maybe it could make a difficult office situation easier to calibrate to.
Hit next, you can look at the color chart, but for most users it doesn’t mean anything.
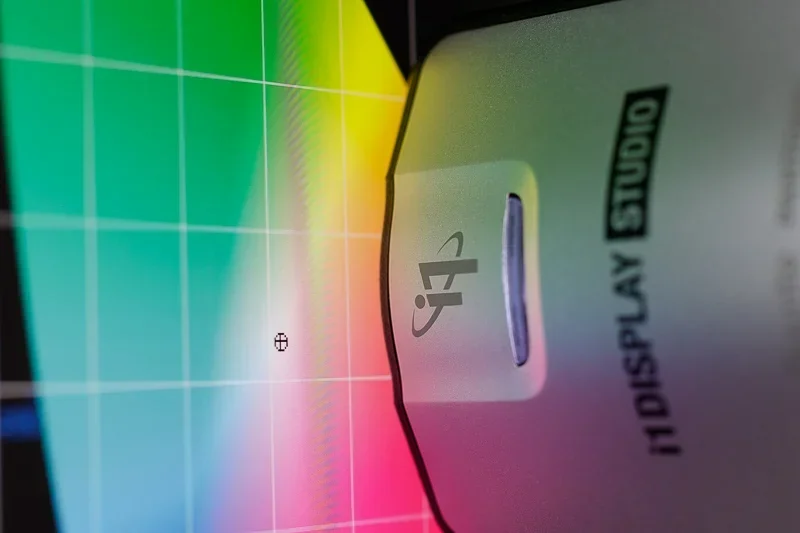
A 118 patch chart is shown on the right, the Calibration Matrix, Unlike the i1 Studio spectrophotometer, your X-Rite i1 Display Studio does not need base tile calibration. It does however need the swivel cover to be open to allow the lens to read color. If closed the application will alert you to do this. Tip: Angle your display tilted slightly upwards to allow the X-Rite i1 Display Studio to have the slightest weight hold it flat on the screen.
I almost forgot to say, there is a clip that allows adjusting the small weight on the cable. You pinch the clamp and slide the weight in the direction needed.
X-Rite i1 Studio, does not have the choice of small medium or large patch sets, nor the choice of LUT profiles as i1 Profiler does. Personally, I have always used Matrix profiles and the 118 patch set. It has been extremely rare in testing to find any discernable differences by using LUTs or large patch sets.
If your monitor has hooks for ADC this allows communication between i1 Studio and your computer to adjust contrast, luminosity, and color channels automatically. You can only choose one manual, or ADC. I recommend whenever possible choose ADC.
While here, make sure you turn off auto brightness etc. All of this is explained on the left panel as guidance.
Click on Measure which takes you to a full screen color patch projection to measure contrast, luminosity then progressive color patches all 118 of them. Measurements take around 5 minutes. If you selected manual, you will be asked to set which controls are available typically luminosity to achieve the closest point to your target brightness.
The save profile 3rd page has a few options, yet again it could not be simpler. Optionally, change the name to something simple, like “myiMaci1DS.
Choose your profile format, usually I think V2 is perfectly fine and has less risk of incompatibility than V4.
If you want the reminder set it to the time delay you like or None. Many recent displays are quite stable, unless you have large climate changes, every 3-4 months will do. Or if you have a print run to do then re-profile, it only takes 5 minutes!
Be aware if you set it to a reminder you will have the XRD updater running in the background, and there is a bug on Mac that launches the Tray every day at 9:30 very annoying.
Under FAQ on this page you can delete the updater files until it is fixed.
Click save and you’ll receive a validation, then a before and after window will appear.
There are a lot of choices here none of which influence your color management: the choices here are purely informational.
You can toggle between Icons image/portrait, TRC Curves, or the CIE color model. Curves is useful showing any weird faults, and the image just visual confirmation.
The image panel has lots of choices, even allowing you to enter your own, as shown in the images below.
Projector Profiling
You’ll find this module even easier!
As sound is to video, your colors projected at presentations is going to make all the difference.
Nothing could be easier.
Choose your projector, leave the white point to native. This is because the type of lights in projectors run best uncorrected for white point. Only set your white point to a target if the condition of the bulb is perfect, and if you have a very good projector that works with adjustment, typically LED.
Calibrate your i1 Studio as shown. Angle the swivel base on your X-Rite i1 Display Studio aimed at the screen
Pay attention to the rapport distance vs height for placement and correct readings. It is just the same very easy to do and automated.
I don’t have a projector so I just hand held my i1 Studio pointing it at my display.
It will measure 118 color patches, at the same speed more depending on projector luminosity.
On the 3rd and last page. You rename your profile something useful like MyBenQ-projector and choose a re-profile reminder delay or none.