
Color management made easy in DaVinci Resolve harnessing the potential with BenQ SW line monitors
What and who this post is for.
Photographers transitioning to video as well as videographers who have experience yet want to apply color management to their process. Any photographer with some awareness of Color Management in stills applications such as Adobe Lightroom, and Photoshop, Capture One etc. will find their way in DaVinci Resolve RLE as well as other video editors such as Final Cut and Premiere Pro.
There are three possibilities ranging from beginner to experienced
1) DaVinci YRGB which is no color management, only your monitor profile and your eyes, hence the need for a calibrated monitor
2) DaVinci YRGB Color Managed which is specific to your input source clips; different with each camera and your settings at the time with auto checked RAW footage is automatically set, Log footage has to be set manually in most cases, or without Auto where you manually set the input default color. If you have multiple cameras you can manually override each camera in the timeline or media pool.
3) using DaVinci RGB Color Managed in combination with Resolve FX Color Color Space Transform
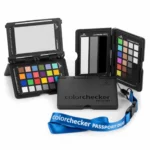
Not much is needed in additional material, and most image makers concerned about color will already have the equipment in this post. That being a Color Checker whatever the format, and an excellent calibrated monitor. Of course, being an ambassador for both BenQ and Calibrite I highly recommend their devices for the value and level of precision they offer.
BenQ SW line of monitors: https://www.benq.eu/en-eu/monitor/photographer.html
Calibrite line of Color Charts: https://calibrite.com
Do you want to get the most from your video clips with easy color management?
Color management doesn’t have to be so complicated that you don’t try.
This post is going to show you some essential easy steps for photographers and videographers just starting up to intermediate users that have not yet harnessed the ultimate potential of editing software.
This post is made for DaVinci Resolve, most versions from V15 and up will be fine. Other editors follow the same theory more or less if using Vector Scopes, but the methods are quite different.
Any of the BenQ SW line of monitors can be used, especially with the excellent option of having multiple calibrations for different color spaces.
Advantages of employing a Calibrite ColorChecker and BenQ monitors

Few videographers will be recording in RAW video as photographers do in photography. What happens with other than raw video; is a choice, your choice of encoding compression CODEC which is great for a huge reduction in file size, yet one that limits how much you can change-edit-push the clip in post-production.
To get the basics right and make life easier editing; a ColorChecker is the best way to go. It will serve for semi-automated color matching in DaVinci Resolve. Much more than that, setting your white balance (funny why do they call it white balance when in fact it is grey balance?) and even giving you a focus check if using a video CC.
Setting a custom white balance in the beginning saves you from gross errors, setting WB for each clip gives you precision. If you have doubts Auto White Balance will get you by yet is a variable that you’ll have to chase around later when editing. Always easy to say, yet it depends on your filming conditions: not everyone is filming in studio controlled sets.
You have a vast array of color settings choices in your cameras. The very easiest and basic will always be a display referenced Rec709. With the default settings you’ll see a pleasing images contrast and color like any typical photo. That is good for quick videos that need no correction.
However, if you have bright lights and dark shadows, you’ll have better luck pulling more out of the clips if you set reduced contrast, saturation, and sharpness providng a flat looking image. Remember other than RAW video clips are being highly compressed so when you edit you want some room in those settings; saturation, levels, and perhaps sharpness. All of these can be pushed or increased, yet once compressed (encoded) into the original clip they cannot easily be pulled back if at all!

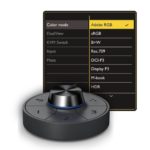
BenQ SW line monitors are top level displays with hardware profiling capabilities.

You say what?
Visually there is not that much difference between a display (monitor, portable, or tablet) yet the differences are in the power of the display itself doing color mapping specifically designed to do that at a higher level than your software calibrated operating system and video card combination can do.
With Palette Master Element, your video card simply puts out a maximum signal with no corrections (in other words no errors) and your BenQ SW monitor takes care of all color mapping in any of the color spaces chosen. This is the only way you can toggle between vastly different color spaces for example Display P3 and Rec709 or a custom set up, impossible on a software calibrated monitor.
This offers you an ultimate experience in editing in a wide gamut space beyond what the viewers will see yet stays intact on the original timeline and source clips with the output intention set to where the final edits are going.
Let’s say you have a very colorful video that you want to output to both YouTube, and eventually an DCI-P3 display or say a light panel. You can view both with ease by selecting the BenQ color space either calibrated or factory presets.
I’ve always said the monitor is your viewport into your images, the better the display the more you’ll believe in your imagery. With video you can push your limits with confidence and reliability.

My two recommended video and photography monitors from BenQ
Click on the links for my reviews on both.
Optional but recommended
Shoot a Calibrite CC chart in your scene at the beginning.
If you can set a custom white balance in the light for the scene. Easy to do on most cameras, refer to your user manuals.
Shoot it close up as well in the same light yet don’t block the light. If using a CC video, use the gloss black strip to check for reflections. The CC charts dislike reflections on the patches as that messes with the reflected light/color. They can be tilted or turned slightly, if necessary, but best to keep them parallel.
Expose so that the chart has the full range of densities from black to white. You’ll use this to either Color Match and or set your colors hues and saturation according to the Vector Scopes.
Sounds difficult yet it is really logical and easy in any editor. Color matching with DaVinci Resolve is semi-automated and included in the free version. Other editors like Final Cut and Premiere Pro have paid plug-ins for color matching. The patches however are a visual aid that all the applications can use. With practice it becomes fast and efficient, and is an excellent indicator to make color correction right from the start.
Beyond the scope of this post, you can go way further into using Calibrite’s Color Checker Charts. You can set your zebra markers to specific limits for accurately exposing in Log. YouTube is also your friend for that!
BenQ SW monitor settings
Really simple you go menu/Color Adjustment/Rec. 709.
Or get out your trusty Calibrite ColorChecker Display Pro and make a calibration for one of your custom calibration slots for Rec709 for more accuracy for that space. While there you could do another for Display P3. That is easily done in Palette Master Element. Just note which calibration slot you put them at, calibration 1, 2, or 3.
The new profiles should be set automatically for the operating system, which are essentially null profiles that send out a pure signal, which is exactly why you can toggle calibrations/color spaces as often as you want at the BenQ display level without any system level intervention.
Note if you have your monitor set to color space Rec 709 (which is almost the same as sRGB) that is what you will see, not more not less. Your color settings in your editing application should correspond.
For advanced users, you can view the timeline in high gamut spaces too, such as HDR, or Native panel calibrations, as long as the output profile/space is Rec709 the viewed colors will be accurate.
We’ll get to that in a minute.
DaVinci Resolve
THE video editing application, not only does the free version do 95% of what even pros need but it is the best color editor out there, period. It includes all the applications in the same platform sound, color grading, editing and Fusion for motion graphics.
Like Photoshop there at least 10 ways to do any operation. Thus, what I will say below can be done with the same results in many methods not marked here!
These YouTube channels have the goods, with all the details:
For your first videos in DaVinci Resolve
For no color management by default in the Project Preferences Color Management will have the preset DaVinci YRGB set. This is a beginners way of WYSIWYG relying on your monitor (better be a calibrated monitor!) relying solely on your eyes. For users that are not shooting in Log, the color spaces are assumed to be Rec709 or sRGB. The default setting DaVinci YRGB is what they call display referred. In other words, it will not use the camera color yet uses your monitor as a reference, which (I assume is Rec 709) setting in Resolve color management preset.
For basic Color Management
Go into your project settings/Color Management
Set your Color Science to DaVinci YRGB Color Managed.
Although others have said to manually set processing etc., I suggest for starting out, leave Automatic Color Management checked.
Color Processing Mode leave it on SDR (Standard Dynamic Range).
Output Color Space SDR Rec. 709
With these settings any RAW footage will automatically select the correct input spaces (transforms) and other log footage should be selected manually if they are not set automatically.
That is all that is needed for an easy good level and great color timeline made for outputting to most video destinations. That said a BenQ SW line monitor will give you an assurance of great color for both your video and stills editing. Personally, I cannot see a way to do any editing without one.

For more advanced users:
Go into your project settings/Color Management
Set your Color Science to DaVinci YRGB Color Managed. Automatic Color Management uncheck.
Manually set Color Processing Mode to HDR DaVinci Wide Gamut Intermediate. This keeps the maximum potential of color for repurposing outputs to various high gamut displays (like HDR).
This is the same notion of a huge synthetic color space that covers more than any camera sensor can capture. All the possible color of digital capture are contained within no matter what the original scene was. In Adobe terms this is Melissa RGB, in Resolve it is DaVinci Wide Color Gamut . Both are intermediate background working spaces that future proof projects and imagery so they can output to any destination color profiles now and in the future as technology offers even higher gamut devices projection or backlit.
This will pull in metadata and or container data and autocorrect from different cameras if in RAW spaces, a good thing. If not RAW, you will select each camera series by assigning their respective input colors say Canon Cinema Gamut, Sony sLog 3 etc., by right clicking on the clip(s) and selecting Input Color Space drop down. This can also be done on the other side in the color module with Color Transform input fields with exactly the same effect.
Output Color Space SDR Rec. 709 Gamma 2.4 if that is what the intended final viewing space will be.
That all that is required for intermediate level color correction giving you enormous range and great color timeline viewing made for outputting to most video destinations, while using log cine LUTs while recording. You can only do this reliably with a color calibrated monitor. That is where BenQ comes in, the best value for high end editing displays for excellent quality vs. price point. Color edits on both stills and videos can be subtle or extreme yet you need to know that your color edits are being shown to you with precision, and reliability.You can select LUTs used if all the footage is from the same camera, or use a Color Space Transform Node for each various camera in the Color Editor module. If this is too complicated yet you wanted to get good results with Log footage, Automatic Color Processing can be checked. That works with many modern hybrid cameras, surprisingly so.

How do you Color Correct before grading in DaVinci Resolve?
First things first, set your color workflow to the above noted settings. These are the basic essential settings for managed color, and output saw Rec709. As stated above beginners can set these at the beginning and all will be fine.
For advanced users your choices are either project preferences Color Management for input spaces i.e.; Log or RAW, or add to each clip a Color Space Transform node in the color module, where you will assign an input color say Sony sLog 3 etc., Input Gamma DaVinci Intermediate, then Output Color Space Rec709. There are the same controls as in the preferences color management, and the colors will correspond to exactly what you set not better or worse in either place.
There are a lot more controls for expert users like gamut and tone mapping. If you shoot RAW video you’ll want to explore those options.
After importing your clips and have set your preferences you are ready for serious yet fun color corrections.
For beginners if you have shot a grey card, you can already add a node in the color module, click on the eye dropper in the primary color wheels and pick the grey card. Rename the node WB. Add a second serial node (option S) and adjust offset, then lift, gain, and perhaps saturation and contrast to make it look good to you, and the waveforms are in the limits of clipping, and skin tones or middle ground looks good.
How do you know if the skin tones are good?
If you open the vector scope check skin tone indicator and 2x zoom. Skin tones will or should be close to the dotted line between red and yellow. This will show the saturation (or volume) of skin tone and hue angle. If the line has a sort of mist around the line you’re set.
Remember I said you need a good monitor? Your eyes can only validate what you see, and that can only be assured with a calibrated monitor. BenQ SW line monitors are easy to calibrated (automated) with a calibrator such as Calibrite CC Display Pro in 5 minutes and provide a validated result +/- Delta E 1. That is the assurance BenQ gives you!

How do you adjust skin tones that are outside of this yet the white balance is set and correct?
You need to add another node, label it skin tone. Make sure curves icon is selected then those tiny icons top right you select the second icon looks like two circles or roll over slowly for tool tips and you’ll find Hue vs Hue. Bottom left click on the spline picker tool, (like an eyedropper in Adobe) and click on some skin tones. This will select the point in the chart. Move the center dot/pin up or down until the skin tones in the Vector scope fall on the indicator line. Simple, no?
Make your life easier! If you shot a first clip with each camera of a Calibrite CC Passport or other chart.
Again, in the color module, top left 7 icons starting with a camera for RAW, next is what we need, the chart icon for Color Match.
First on the top right choose the chart shot, I often forget and some funny stuff happens with the grid, the match. I like the Calibrite CC Video Passport but all the other charts listed will work, but only if you select the right chart!
In the top part of the preview window where the controls are bottom left, you have what is shown in the window. Off Qualifier Power Window etc. and what you need to select the chart overlay. Pull the corners down onto the borders of the chart. When the center of the squares or rectangles fit onto their placements on the chart double check that the patches are centered you are ready to either select manual input gamma or Auto depending on your source clips, target gamma will be for Rec709, yet for most purposes Auto in all cases works for timelines output to Rec 709.
Add a second node label it WB, select the next icon beside the Color Match; Primaries Color Wheels, pick up the eyedropper and click on any of the notched patches (grey neutral).
Now you have a Color Matched node to align color primaries of your camera with the settings used, and the newly matched colors are corrected for a white balance. Any nodes after maybe subtle changes for contrast, saturation, expanding lift, Gain, or offset to arrive at a color correction that you like.
Any styles you want to add are called color grading which is stylizing your clips. They should live in their own nodes and or groups as they are subjective edits beyond the essential first steps of color correction.
To go beyond advanced users may want to use Hue vs. Hue and Hue vs. Sat nodes to align the primaries in the chart to the Vector scope to their hue angles.
In theory it is easy enough to do. Yet my results were not as good as simply using the chart to do a Color Match in the first node. All scopes are just indicators, normally if your colors look good, the white is balanced, your footage is ready to be color graded.


